Google
 
Showing posts with label AWS. Show all posts

Friday, January 17, 2025

Managing Logical Environments in AWS CDK: Using Qualifiers to Avoid Conflicts

Infrastructure as Code or IaC is an essential tool in modern DevOps. If you're working with AWS as your primary cloud provider, you're very likely working with one of the two tools AWS offers for IaC: CloudFormation or CDK.

While CDK provides some extra capabilities compared to CloudFormation, it requires some infrastructure to already exist in order to perform certain functionality. This infrastructure was optional in CDK v1 but is mandatory in CDK 2 to provision any stacks. The process of creating these infrastructure components is called bootstrapping.

Assuming that you have CDK tooling already set up on your machine, it's relatively easy to perform the bootstrapping process:

cdk bootstrap aws://{account-id}/{region}
cdk bootstrap aws://123456789012/ap-southeast-2

By default, this will create a stack with the name CDKToolkit:


 This stack include some resource like an ECR repository and S3 bucket:


As shown in the screenshots, the resources include a default qualifier "hnb659fds", which aside of being a random ugly string, this default is challenging when we have multiple logical environments like dev and test in the same AWS account because we'll have to use the same resources to serve these logical environments.

If it's required to separate these environments and have two different sets of CDK resources, we need to distinguish between these environments by specifying a qualifier. At the same time, we need to ensure that stack names don't conflict.

To achieve this, CDK CLI provides two parameters:

  1. --qualifier: replaces the default "hnb659fds" string in resource names.
  2. --toolkit-stack-name: overrides the default stack name.

For example, to bootstrap two separate logical environments, we can use:

cdk bootstrap aws://123456789012/ap-southeast-2 --qualifier dev --toolkit-stack-name CDKToolkit-dev
cdk bootstrap aws://123456789012/ap-southeast-2 --qualifier test --toolkit-stack-name CDKToolkit-test

This results in creating stacks and resources as shown:


The next question is: How to target a specific bootstrap qualifier when you deploy?
One way is to update cdk.json configuration file to set the bootstrap identifier:

cdk.json
"context": {
    "@aws-cdk/core:bootstrapQualifier": "test"
  }

If you prefer to set this value dynamically, for example to pass the environment name in a CI pipeline as an environment variable, you can use code instead: (This example uses C#)

var qualifier = Environment.GetEnvironmentVariable("CDK_QUALIFIER");
var synthesizer = new DefaultStackSynthesizer(new DefaultStackSynthesizerProps() { Qualifier = qualifier });
var stack = new Stack(app, "my-stack", new StackProps() { Synthesizer = synthesizer });

This method allows you to set up multiple environments within a single AWS account, enabling the application of distinct policies to CDK assets for logical divisions like dev and test or for separate teams sharing the account.


Thursday, August 17, 2017

My AWS IaaS playlist for Arabic speakers

If you're an Arabic speaker and interested in learning about AWS IaaS, check my AWS IaaS [Arabic] Youtube playlist. In this series of videos I go step by step creating a scalable, secure web application using AWS infrastructure as a service offering.
I'm following a problem-solution approach. I start with a very basic but functional solution, I identify the challenges the solution has, then I move to the next step in a logical progression towards achieving the end goal.


And if you have no idea what capabilities AWS has, you can check my introductory video. It's a bit dated but still relevant.

Sunday, July 23, 2017

My talk at DDDSydney 2017

It was very excising to attend and speak at DDDSydney 2017. a lot of interesting topics have been presented and the organizers have done a good job classifying the sessions into tracks that one can follow to get a complete picture about a certain area of interest. For example my session "Avoiding death by a thousand containers. Kubernetes to the rescue!" was the last in a track that had sessions about microservices and docker. That made it a logical conclusion on how to host containerized microservices in a highly available and easy to manage environment.

In my demos I used AWS. This choice was intentional since AWS doesn't support Kubernetes out of the box as both Google Container Engine (GKE) and Azure Container Service (ACS) do. I wanted to show that Kubernetes could be deployed to other environments as well. Thanks to Kops (Kubernetes Operations) which made it relatively easy to deploy the Kubernetes cluster on AWS.
I this session I showed how to expose services using an external load balancer and how deployments make it easy to declare the desired state of the Pods deployed to Kubernetes. I also demonstrated the very powerful concept of Labels and Selectors which is a loosely coupled way to connect services to the Pods that contain the service logic.


I Also demonstrated how easy it is to perform an updated to the deployment by switching from Nginx to Apache (httpd).
In another demo I wanted to demonstrate how to connect services inside the cluster. I made a simple .net core web application that counts the number of hits each frontend gets. The hit count is stored in a Redis instance that's exposed through a service.


The interesting part is how the web application determines the address of the Redis instance. As the docker image should be immutable once created, configurations should be stored in the environment.

As in the above code snippet, the environment variable REDIS_SERVICE_HOST is used to get the address of the Redis service. This environment variable is automatically populated by Kubernetes since the Redis service is created before the web application deployment. Otherwise DNS service discovery could be used. I used a simple script to hit the web API and the result was. I also manually deleted Pods that host the web API and thanks to Kubernetes' desired state magic it kept creating new instances automatically. And that was the result of hitting the service:


Requests go through AWS load balancing to Kubernetes nodes. The service passes the requests to Pods hosting the API.

Kubernetes is one of the fast moving open source projects and I think the greatest thing about it is the community and wide support. So if you're planning to host containerized workloads, give it a try!


Wednesday, November 9, 2016

Nano Server on AWS: Step by Step

Windows server 2016 comes in many flavors. Nano server is the new addition that is optimized to be lightweight and with smaller attack surface. It has much less memory and disk footprint and much faster boot time than Windows Core and the full windows server. These characteristics make Nano a perfect OS for the cloud and similar scenarios.
However, being a headless (no GUI) OS means that no RDP connection can be made to administer the server. Also since only the very core bits are included by default means that configuring the server features is a different story than what we have in the full windows server.
In this post I'll explain how to launch and connect to a Nano instance on AWS. And then use the package management features to install IIS.

Launching an EC2 Nano server instance:

  • In the AWS console under the EC2 section, click "Launch Instance"
  • Select the "Microsoft Windows Server 2016 Base Nano" AMI.


  • In the "Choose an Instance Type" page, select "t2.nano" instance type. This instance type has 0.5GB of RAM. Yes! this will be more than enough for this experiment.
  • Use the default VPC and use the default 8GB storage.
  • In the "Configure Security Group" page things will start to be a bit different from the usual full windows server. Create a new security group and select these two inbound rules: 
    • WinRM-HTTP: Port 5985. This will be used for the remote administration.
    • HTTP: Port 80. To test IIS from our local browser.

  • Note that AWS console gives a warning regarding port 3389 which is used for RDP. We can safely ignore this rule as we'll use WinRM. RDP is not an option with Nano server.
  • Continue as usual and use an existing key pair or let AWS generate a new key pair to be used for windows password retrieval.


Connecting to the Nano server instance:

After the instance status becomes "running" and all status checks pass, observe the public IP of the instance. To manage this server, we'll use WinRM (Windows Remote Management) over HTTP. To be able to connect the machine, we need to add it to the trusted hosts as follows:
  • Open PowerShell in administrator mode
  • Enter the following commands to add the server : (assuming the public IP is 52.59.253.247)
$ip = "52.59.253.247"
Set-Item WSMan:\localhost\Client\TrustedHosts "$ip" -Concatenate -Force

Now we're ready to connect to the Nano server:
Enter-PSSession
-ComputerName $ip -Credential "~\Administrator"


PowerShell will ask for the password which you can retrieve from AWS console using the "Get Windows Password" menu option and uploading your key pair you saved on your local machine.

If everything goes well, all PowerShell commands you'll enter from now on will be executed on the remote server. So now let's reset the administrator password for the Nano instance:
$pass = ConvertTo-SecureString -String "MyNewPass" -AsPlainText -Force
Set-LocalUser -Name Administrator -Password $pass
Exit 

This will change the password and disconnect. To connect again, we can use the following commands and use the new password:
$session = New-PSSession -ComputerName $ip -Credential "~\Administrator"
Enter-PSSession $session


Installing IIS:

As Nano is a "Just Enough" OS. Feature binaries are not included by default. We'll use external package repositories to install other features like IIS, Containers, Clustering, etc. This is very similar to apt-get and yum tools in the Linux world and the windows alternative is OneGet. The NanoServerPackage repository has instructions regarding adding the Nano server package source which depends on the Nano server version. We know that the AWS AMI is based on the released version, but it doesn't harm to do a quick check:
Get-CimInstance win32_operatingsystem | Select-Object Version

The version in my case is 10.0.14393. So to install the provider, we'll run the following:
Save-Module -Path "$env:programfiles\WindowsPowerShell\Modules\" -Name NanoServerPackage -minimumVersion 1.0.1.0
Import-PackageProvider NanoServerPackage

Now let's explore the available packages using:
Find-NanoServerPackage
or the more generic command:
Find-Package -ProviderName NanoServerPackage


We'll find the highlighted IIS package. So let's install it and start the required services:
Install-Package -ProviderName NanoServerPackage -Name Microsoft-NanoServer-IIS-Package
Start-Service WAS
Start-Service W3SVC


Now let's point our browser to the IP address of the server. And here is our beloved IIS default page:


Uploading a basic HTML page:

Just for fun, create a basic HTML page on your local machine using your favorite tool and let's upload it and try accessing it. First enter the exit command to exit the remote management session and get back to the local computer. Note that in a previous step, we had the result of the New-PSSession in the $session variable so we'll use it to copy the HTML page to the remote server over the management session:
Copy-Item "C:\start.html"  -ToSession $session -Destination C:\inetpub\wwwroot\

Navigate to http://nanoserverip/start.html to verify the successful copy of the file.


Conclusion:

Nano server is a huge step forward to enable higher density of infrastructure and applications especially on the cloud. However it requires adopting a new mindset and a set of tools to get the best of it.
In this post I just scratched the surface of using Nano Server on AWS. In future posts we'll explore deploying applications on it to get real benefits.

Friday, May 20, 2016

Introduction to AWS video [Arabic]

My video "Introduction to AWS [Arabic]" on Youtube.

Saturday, February 27, 2016

AWS Elastic Load Balancing session stickiness - Part 2

In my previous post "AWS Elastic Load Balancing session stickiness" I demonstrated the use of AWS ELB  Load Balancer Generated Cookie Stickiness. In this post we'll use application generated cookie to control session stickiness.
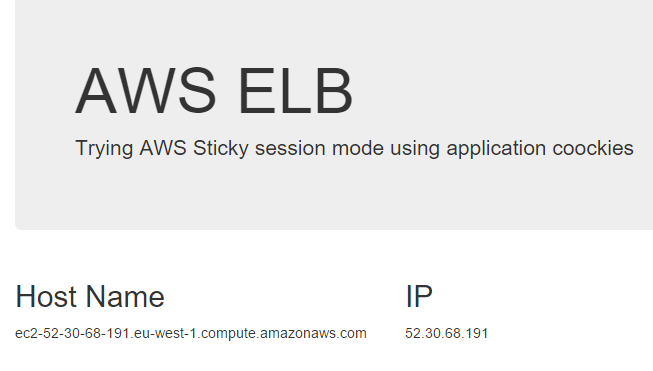
To demonstrate this feature, I created a simple ASP.NET MVC application that just displays some instance details to test the load balancing.

Starting from the default ASP.NET MVC web application template, I modified the Index action of the HomeController:


Similar to what I've done in the previous posts using Linux shell scripts, this time I'm using C# code to request instance metadata from the http://169.254.169.254/latest/meta-data/ URL then I store the host name and IP address in the ViewBag object and display them in the view:


I deployed the application to two EC2 Windows 2012 R2 instances. As expected, using the default ELB settings, requests will be routed randomly to one of the instances. This can be tested by looking at the host name and IP displayed in the response.

Looking to the request and response cookies, we can find the asp.net session cookie added:

To configure stickiness based on the ASP.NET_SessionId cookie, edit the stickiness configuration and enter the cookie name:


Checking the cookies, we find that ELB generates a cookie named "AWSELB". As documented: "The load balancer only inserts a new stickiness cookie if the application response includes a new application cookie."


Now the browser will send back both the session and ELB cookies:

Still my preference for maintaining session state is to use a distributed cache service like Redis or even SQL server. Because in case an instance goes down or is removed from an auto-scaling the user will lose his session data in case it's stored in memory.

Saturday, February 6, 2016

Introduction to AWS presentation

My Introduction to AWS presentation that I presented at the Architecture Titans technical club.

Monday, January 4, 2016

AWS Elastic Load Balancing session stickiness

In a previous post "Configuring and testing AWS Elastic Load Balancer" I described how to configure AWS ELB to distribute load on multiple web servers.
We observed that the same client might get routed to a different EC2 instance. Some applications require the user to always be directed to the same instance during his session. This is the case when an in-memory session state is used or any other application specific reason. This requirements is often referred to as session stickiness.
AWS ELB offers two ways to provide session stickiness: using a cookie provided by the application, or using a cookie generated by ELB.

Load Balancer Generated Cookie Stickiness

Using an Expiring cookie
Using the same configuration as the previous post, the load balancer will have the stickiness configuration set to "Disabled". 
To change this behavior:
  1. Click "Edit" link
  2. Select "Enable Load Balancer Generated Cookie Stickiness" option.
  3. As a testing value, enter 60 as an expiration period.

Editing stickiness properties of ELB

Now, let's start testing the effect of this new configuration. Open the test url (for example: http://test-elb-834781956.eu-west-1.elb.amazonaws.com/cgi-bin/metadata.sh, check the previous post for more details). Using fiddler or network tab in developer tools of your favorite browser, you can observe that the response includes this header:

Set-Cookie: AWSELB=A703B168326729FE0B7D2675641656C1889E580D7525169B4BE36A819D9F2A18BE64415E6B0C90F5F2AC8CB0CFAF8DABE929DB27D5077D6FF616065A5BAF81DDB430BE92;PATH=/;MAX-AGE=60

As we see, it's a cookie named "AWSELB" with max-age of 60 seconds. and it applies to the whole site.

AWSELB cookie in in the response as appears in Chrome dev tools

If you refresh the page, you'll find that the browser sends the cookie as expected:

Cookie: AWSELB=A703B168326729FE0B7D2675641656C1889E580D7525169B4BE36A819D9F2A18BE64415E6B0C90F5F2AC8CB0CFAF8DABE929DB27D5077D6FF616065A5BAF81DDB430BE92


The cookie is sent by the browser, and the response does not include a new cookie

But the response does not include the cookie. So it will expire after 60 seconds and the browser will not send it after expiration. Refreshing the browser several times will direct the traffic to the same EC2 instance, we can verify this by examining the response which looks like:

Host name:
ec2-52-30-170-211.eu-west-1.compute.amazonaws.com
Public IP:
52.30.170.211

As soon as the cookie is still active, the request is directed to the same instance. But what happens after the max-age passes?
A new cookie will be generated and you might be directed to one of the other web servers, and a new cookie with another value will be generated by ELB:

Set-Cookie:AWSELB=A703B168326729FE0B7D2675641656C1889E580D7525169B4BE36A819D9F2A18BE64415E6B0C90F5F2AC8CB0CFAF8DABE929DB27D5077D6FF616065A5BAF81DDB430BE92;PATH=/;MAX-AGE=60

Notice that the value of the cookie has changed. And after this cookie expires, a new cookie might be generated using the old value pointing to the first instance.


Using an ELB cookie without expiration:
If the expiration values is left blank, then the behavior differs. The cookie will be generated without the max-age value. And the browser will send the same cookie until it's closed.

Set-Cookie:AWSELB=A703B168326729FE0B7D2675641656C1889E580D7525169B4BE36A819D9F2A18BE64415E6B0C90F5F2AC8CB0CFAF8DABE929DB27D5077D6FF616065A5BAF81DDB430BE92;PATH=/


What happens when a server goes down?
To try this scenario, let's shut down the server which is getting the requests and refresh the browser. This time ELB generates a new cookie pointing to a healthy instance.


Summary:
ELB has a built-in mechanism to support session stickiness with no code changes from the application side.
Using an expiring cookie might not be the best option to guarantee session affinity as the cookie is not renewed and it seems that there is no way to achieve a sliding expiration window for it. So you might prefer to go with a cookie without expiration.

In the next post, we'll use the other method available for session stickiness: using Application Generated Cookie Stickiness.

Friday, May 15, 2015

Configuring and testing AWS Elastic Load Balancer

Load balancing is an essential component for the scalability and fault tolerance of web applications. Major cloud computing providers have different offerings for load balancing.
In this post I'll explore AWS's (Amazon Web Services) ELB (Elastic Load Balancing) feature, and test it to see how it distributes the load on front-end web servers, and in case of unavailability of one of the front-end servers, how traffic is directed to the healthy instance(s).


I'll use Linux based image, but the concepts apply to Windows images. I assume that the reader has the basic knowledge on how to create an AWS account and create EC2 (Elastic Compute Cloud) virtual machine. If not, don't worry, following the steps below will give you a good understanding.

So the experiment goes as follows:


1- Create a base image for front-end web servers: 


  1. Go to AWS console and select "Launch Instance", from the list of images, select "Ubuntu Server 14.04 LTS".
  2. Complete the wizard till you reach the "Configure Security Group" step. In this is the step we select the proper ports we need AWS to open. Select SSH (22) to connect to the instance to configure it, and HTTP (80) to serve web traffic.
  3. When you're prompted to select the key pair, make sure to choose an existing one you have already downloaded or create a new one and keep it in a safe place.
  4. Then Launch the instance.

Note: When I first stared using AWS, and being from a windows background, the term "Security Group" was a bit confusing to me, it's about firewall rules not security groups in the sense of Active Directory Groups.

2- Configure Apache web server

The image does not have a web server installed by default, so I'll SSH into the instance and install it.
If you're using MAC or Linux, you should be able to run SSH directly. For Windows users, you can use Putty.
  1. Copy the public IP of the running instance you just created.
  2. Use SSH to connect using this command:  ssh -l ubuntu -i . for example: ssh 54.72.151.182 -l ubuntu -i mykey.pem . note that ubuntu is the username for the image we created this machine from. the .pem file acts as a password.
  3. Now we are inside the instance. It's time to install and configure Apache:

sudo su
apt-get install apache2
sudo a2enmod cgi
service apache2 restart

The above commands simply do the following:
  • Elevate privileges to run as a super user to be able to install software.
  • Install apache using the package manager.
  • Enable CGI, I'll show you why later
  • Restart apache so that CGI configuration takes effect.

Now it's time to test the web server. Visit http://INSTANCE_IP and you should be welcomed with the default apache home page.


3- Create a script to identify the running instance

To test ELB, I need to identify which instance served the request just by looking into the response to a web request. Now I have 2 options: Create static pages on each web fron-end or create some dynamic content that identifies the instance. And I prefer the latter option as I'll use the same image for all front-ends.
EC2 has a nice feature called instance metadata. It's an endpoint accessible from within EC2 instances that can be called to get information about it. From SSH terminal try:


curl http://169.254.169.254/latest/meta-data/

A list of available meta-data will be shown:

ami-id
ami-launch-index
ami-manifest-path
block-device-mapping/
hostname
instance-action
instance-id
instance-type
local-hostname
local-ipv4
mac
metrics/
network/
placement/
profile
public-hostname
public-ipv4
public-keys/
reservation-id
security-groups
services

Appending any of them to the URL will show the value. For example:


curl http://169.254.169.254/latest/meta-data/public-hostname
curl http://169.254.169.254/latest/meta-data/public-ipv4

And I'll use these two meta-data items to identify the instances by showing them within a bash script and then serve it from apache. cd into /usr/lib/cgi-bin

cd /usr/lib/cgi-bin

This is the default location that apache uses to serve CGI content. That's why I enabled CGI in a previous step.
in that folder I'll create a bash script that shows the output of the meta-data. use any text editor. For example run nano in the command line and paste the below script:

#!/bin/bash

echo "Content-type: text/text"
echo ''
echo 'Host name:'
curl http://169.254.169.254/latest/meta-data/public-hostname
echo ''
echo 'Public IP:'
curl http://169.254.169.254/latest/meta-data/public-ipv4


If using nano, ctrl+X, y. save as metadata.sh

Now we need to grant execute permission on this file:

chmod 755 /usr/lib/cgi-bin/metadata.sh

To test the configuration, browse to http://INSTANCE_IP/cgi-bin/metadata.sh
My results look like:

Host name:
ec2-54-72-151-182.eu-west-1.compute.amazonaws.com
Public IP:
54.72.151.182

Note: I'm not advising using bash scripts in production web sites. It just was the easiest way to spit out info returned from the meta-data endpoints with minimal effort.

4- Create 2 more front-ends

Now we have an identifiable instance. Let's create more of it.
  1. Stop the instance from the management console
  2. After the instance has stopped, right click -> image -> create image.
  3. Choose and appropriate name and save.
  4. Navigate to AMI (Amazon Machine Image) and check the creation status of the image.
  5. Once the status is available click launch
  6. In the launch instance wizard, select to launch 2 instances
  7. Select the same security group as the one used before, it will have both 22 and 80 ports open.
  8. Start the original instance. 
  9. Now we have 3 identical servers.
  10. Using the IP address of any instance, navigate to the CGI script, for example: http://52.17.134.221/cgi-bin/metadata.sh
Note that most probably the IP of the first instance is now different after restart.


5- Create an ELB instance

  1. In AWS console, navigate to "Load Balancers".
  2. Click "Create Load Balancer"
  3. Make sure it's working on port 80
  4. Select the same security group
  5. In the health check, in the ping path, enter "/". This means that ELB will use the default apache page for health check. In production, it might not be a good idea to make your home page the health check page.
  6. For quick testing, make the "Healthy Threshold" equal to 3.


Now a bit of explanation is required. This configuration tells ELB to check for the healthiness of a front-end instance every 30 seconds. A check is considered successful if the server responds in 5 seconds.
If a healthy instance does not respond with that period for 2 consecutive failures, it's considered unhealthy. And similarly, an unhealthy instance is considered healthy again if it responds to the check 3 consecutive times.

Now select the 3 instances to use for load balancing. And wait until the ELB instance is created and the 3 instances in the "instances" tab are shown InService.

Now in the newly create ELB, select the value of the DNS name (like test-elb-1856689463.eu-west-1.elb.amazonaws.com) and navigate to the URL of the metadata page. My url looked like:
http://test-elb-1856689463.eu-west-1.elb.amazonaws.com/cgi-bin/metadata.sh

The data displayed in the page will belong to the instance that actually served the request. Refresh the page and and see how the response changes. In my case ELB worked in a round robin fashion and the responses where:


Host name:
ec2-52-17-134-221.eu-west-1.compute.amazonaws.com
Public IP:
52.17.134.221


Host name:
ec2-52-16-189-41.eu-west-1.compute.amazonaws.com
Public IP:
52.16.189.41


Host name:
ec2-52-17-65-93.eu-west-1.compute.amazonaws.com
Public IP:
52.17.65.93

Inspect the network response using F12 tools and note the headers:

HTTP/1.1 200 OK
Content-Type: text/text
Date: Sat, 16 May 2015 19:12:38 GMT
Server: Apache/2.4.7 (Ubuntu)
transfer-encoding: chunked
Connection: keep-alive


Note: nothing special as there is no session affinity.


6- Bring an instance down

Now, let's simulate an instance failure. Let's simply stop the apache service on one of the 3 front-ends. So ssh into one of the 3 instances and run:

sudo service apache2 stop

Refresh the page pointing to the ELB url, note that after a few seconds, you only get responses from the 2 running instances. After about 1 minute, the instance is declared OutOfService in the Instances tab of ELB.


7- Bring it back!

This time, turn on apache service by running:

sudo service apache2 start

Wait about one and half minutes, the instance is back to InService status and you start to get responses from it.
The "Healthy Hosts ( Count )" graph shows a very good representation of what happened:

8- Turn them all off!

They are costing you money, unless you are still under the free tier. It's recommended to terminate any EC2 and ELB instances that are no longer used.

Note:
If you intend to leave some instances alive, it's recommended to de-register the instance from ELB when shut down: http://docs.aws.amazon.com/ElasticLoadBalancing/latest/DeveloperGuide/elb-deregister-register-instances.html


Summary:

In this post, we've seen ELB in action using its basic settings. The round robin load balancing worked great and health check made our site available to users by eliminating unhealthy instances.
This works great with web applications that don't require session affinity, for applications that require it, well, that's another post.