Google
 

Sunday, April 4, 2010

LINQ to entities unncecessary casts

Using LINQ with Entity Framework can give a big productivity boost. It removes the burden of O/R mapping and writing SQL queries. But Adding this layer can come with costs.
I was writing a desktop application that uses a SQL CE database and I used LINQ to entities to talk to the database.
One of the methods was slow and I suspected that the reason can be a slow query. In normal, hand-written SQL queries, I inspect query plans to check the reason for the bad performance. So I started to log queries generated by LINQ statements using:

(myQuery as ObjectQuery).ToTraceString()

Then I took the SQL query from log file to SSMS and I started to make some enhancements. One of them was adding an index to a smallint column used in a foreign key. But I discovered that the index was not used by SQL CE. That was strange, but looking to the where statement generated I found something like:

WHERE ( CAST( [Extent1].[PageNumber] AS int)) = ( CAST( @p__linq__468 AS int))

And the index on the PageNumber column (smallint) was not used as I found from execution plan that filtering is made after a table scan (not index seek).
I suspected that the cast used in the above query is what caused the optimizer not to recognize that the index should be used, and I verified this by removing the cast and running the query in SSMS again. This time the index is being used.
I started to Google about this issue. But found that SQL Server is smart enough not to be tricked by the silly cast. But since I'm using SQL CE. I had to find a way to fix this issue.
Removing the unnecessary cast was out of my hands, so I decided to change the data type of the column to int and sacrifice some space to gain some speed. I did that and updated the model. And the where clause became:

WHERE [Extent1].[PageNumber] = ( CAST( @p__linq__468 AS int))

No casts for the PageNumber column and the index is used.

When you use a high level technology, you take it with its pros and cons. But there are no excuses, you are responsible for what you ship to your client.
Thursday, April 1, 2010

Splitting csv file based on content in one line using PowerShell

Problem:
you have a csv file that contains department employees in a format like this:
Department,Employee
Sales,emp1
HR,emp2
Sales,emp3
Finance,emp4
Finance,emp5
Security,emp6
Security,emp7
Security,emp8
HR,emp9
And you need to split this file contents to separate files based on department name. So for the above example, we should get four files, Sales.csv, HR.csv, Finance.csv, and Security.csv. Each file contains only it's employees.
And the solution is really shows the power of PowerShell pipelining:

Import-Csv file.csv | Group-Object -Property "department" | Foreach-Object {$path=$_.name+".csv" ; $_.group | Export-Csv -Path $path -NoTypeInformation}

Dissecting the above commands:
Import-Csv file.csv:
Parses the csv file and returns an array of objects.

| Group-Object -Property "department":
Since we need to split by department, it makes sense to group objects by the department property.

| Foreach-Object {...}:
We need to apply an action for each group (department). So we pipeline the resulted groups to Foreach-Object

$path=$_.name+".csv":
Within the foreach, we need to create a temporary variable ($path) to be passed to the next pipeline responsible for the actual saving. Note that I use the semicolon ";" to separate this part from the next. And I used the name property of the group (which maps to department name in our case) to format the file name.

$_.group | Export-Csv -Path $path -NoTypeInformation
:
Then for each group we have, we need to export its contents (csv file rows) to the file path created in the past step. So we again pipeline the group property of the group item (which is an ArrayList of original objects) to the Export-CSV Cmdlt.

And the result should be files like:
Finance.csv:
"Department","Employee"
"Finance","emp4"
"Finance","emp5"

Mounting file systems on Ubuntu

I'm not an experienced Linux user. But I use Ubuntu (after trying redhat and Fedora) since it's supposed to be (Linux for human beings).
I have both Vista yes :( and Ubuntu on the same machine. And I regularly need to access ntfs file system with windows files when using Ubuntu.
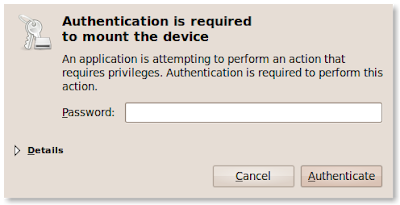
When I open the file system from nautilus, I get this message, and I have to enter the root password.

This is very annoying. And although the prompting for the password can be suppressed (but this is another story). The real issue is that the file system is not automatically mounted when the system starts up. This means that when using an application that needs to access the hard drive (virtual box for example). I have to open the drive from nautilus first.
So the solution is to edit the /etc/fstab file that contains the information needed to mount volumes on startup.
This is OK, I opened a terminal, and ran sudo -i to run as root then made a folder to mount the volume under: mkdir /mount/DriveName
then gedit and opened /etc/fstab/ and added:

/dev/sda1 /media/DriveName ntfs rw,nosuid,nodev,allow_other,default_permissions,blksize=4096 0 0

restarted and I could access the file system without prompting for password. Then I started to test how I can access the file system (I'm a good developer and I do test my work). Everything looked OK. But when I try to delete a file:
Cannot move file to trash, do you want to delete immediately?
I checked the permissions and found that root is the owner and the group that has access. I also could write to .Trash-1000 (similar to $RECYCLE.BIN in windows)
The solution was to go back to fstab and adding the username I use as the owner:

/dev/sda1 /media/DriveName ntfs rw,nosuid,nodev,allow_other,default_permissions,blksize=4096,uid=username 0 0

And finally, I'm happy !!